A workflow is a DAG (directed acyclic graph) formed from different processing modules.
This section lists all the workflows you have created, together with the workflows that you have subscribed to in the Dunia Marketplace. You can create a new workflow by clicking on the “+” top-left icon (the different fields are explained below for the Edit description action).
Several actions are available for a particular workflow:
 Edit description
You can edit the name, description, and the tags associated with the workflow.
Furthermore, you can lock the workflow to prevent changes to its definition. Once locked, you can publish the workflow to your place in the Dunia Marketplace, where you can opt to make it available for subscription to other users.
 Edit workflow: it will open the workflow editor, detailed in the next sections.
 Clone workflow: duplicates the current workflow, creating a new independent copy.
 Start execution: will trigger the execution of the workflow, detailed in the next sections.
 Generate script: allows exporting the workflow definition in other formats (such as CWL and bash script).
 Delete current workflow: removes the workflow from the active workflows list.
 Show execution results: displays all the outcomes of the past executions of this workflow.
 Trace execution: displays a timeline with the executions (and their statuses) of this workflow.
Edit workflow
The workflow editor is like a canvas for dragging, dropping, and connecting processing modules:

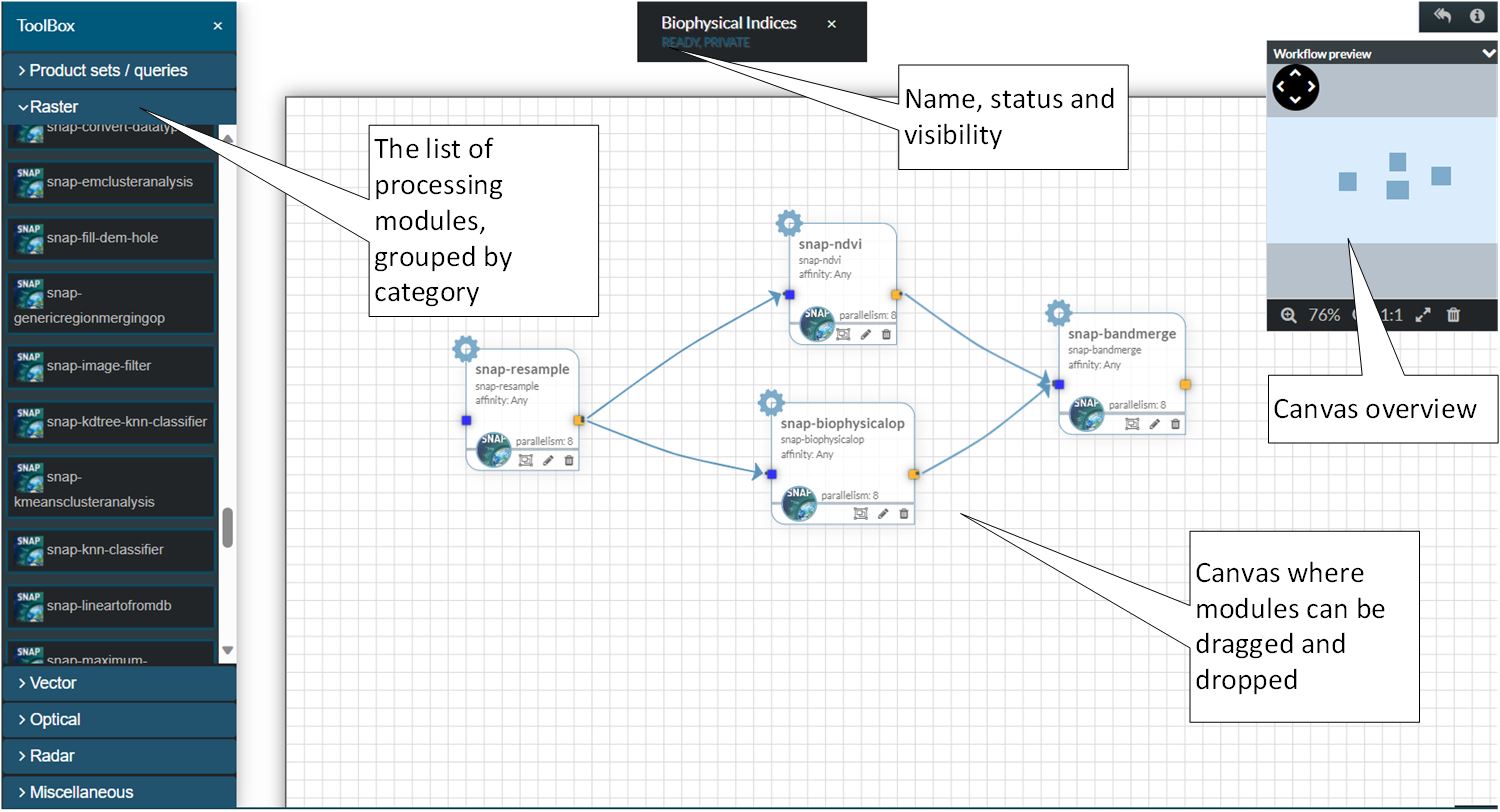
The modules are grouped in categories. The available categories are:
- Product sets/queries: contains the available product sets and saved queries that can be used as inputs for a workflow.
- Raster: groups the modules that can process general raster files.
- Vector: groups the modules that can process general vector files.
- Optical: groups the modules that can process optical EO products, such as from Sentinel-2, Landsat-8, etc.
- Radar: groups the modules that can process SAR EO products, such as those from Sentinel-1.
- Miscellaneous: modules that were not put in any of the above categories.
- Condition: two special modules for conditional execution support.
It is advisable not to mix modules from different thematic categories (such as Optical with Radar) since they may not work together. You can use modules from thematic categories with modules from general categories (for example, Optical with Raster).
A module has input ports (the blue dots), output ports (the yellow dots), and parameters. To connect modules, you simply click on an output port of a module, hold the mouse button down, and drag the cursor to an input port of another module. Each port indicates what format is expected (such as raster, vector, etc.). Therefore, some compatibility checks are performed to see if the link can be created.
Parameters of a module can be edited by clicking the pencil icon of a node. They are displayed in a pop-up docked to the right of the canvas:
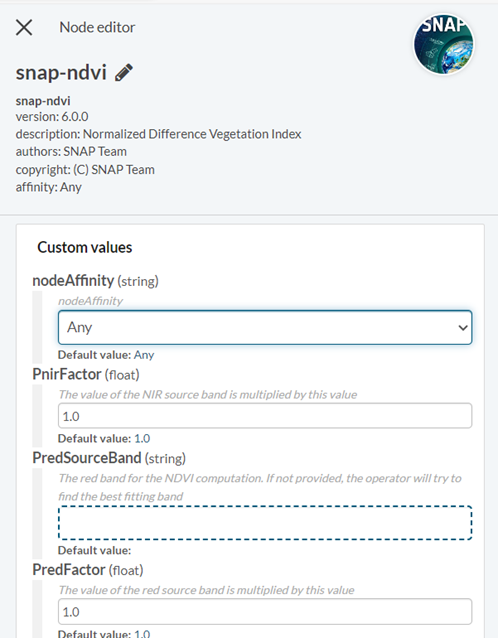
A node can be removed from the canvas by clicking the bin icon on the node.
Start execution
Before the workflow is submitted for execution, the action displays a dialog in which you can select the input of the workflow (if not done so in the workflow editor), to change the values of parameters of constituent modules, and to assign a label for the execution:
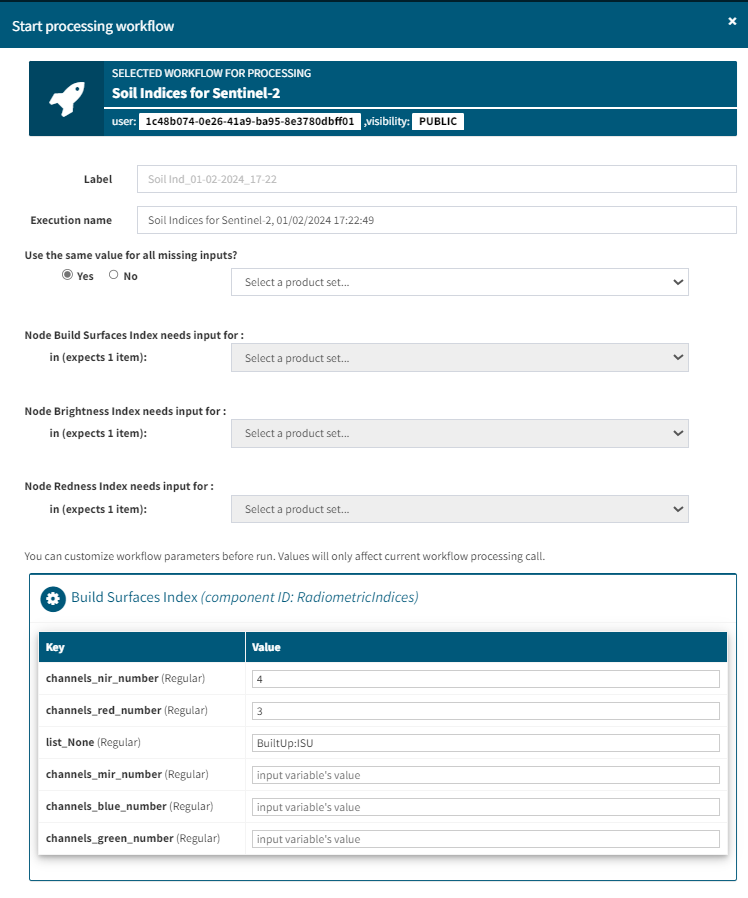
Once you are done with any changes, you submit the workflow for execution by clicking the “Process workflow”.
The workflow execution may not start immediately. Since the platform has limited resources and is used by many users, the tasks to be executed are placed in a queue. Then, based on the availability of resources, they are dequeued and the execution begins on dedicated VMs (depending on your quota).
You can follow the progress of the execution on the Dashboard page, in the Running Jobs section. Once the execution is complete, it will be moved to the Executions History section.
The results of the executions will be saved in the Local repository and moved to the S3 bucket. The intermediate results (if any) will be deleted.